 |
| No "Fraytality" puns, please. |
There are a plethora of
finishing options out there that we've gone though, but you might wonder which one is "best" in terms of preventing fraying in the long-term. As you create garments that you might want to wear and wash often, durability of your seams might become a concern.
In order to test the durability of the various raw edge finishing techniques, I've created a test swatch. Each edge of the swatch will use a different finishing technique, and then it will put the swatch through the a machine wash/dry cycle multiple times and track the progress of the raw edge and see how it frays. Of course, I'm only testing raw-edge finishing, not any finishing technique that encloses the raw edge, like
bias tape or
french seam, as those do not weather in a washing machine quite so badly since the raw edge is not open to the elements.
In order to carry out this experiment, I cut out a 6" square piece from a woven material that will easily fray in the washing machine. Using a permanent marker, I measured a ⅝" line representing the standard seam line inside of each edge, and then applied a different basic finishing technique to each:
The contenders:
 |
| Machine Zig-Zag stitch |
 |
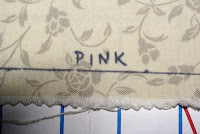
| Pinking (apologies for the poor photo quality) |
 |
| Machine Overlock |
 |
| A fray-stopping adhesive |
I then put the square through the washer/dryer cycle several times with regular loads of laundry, without trimming or cleaning up the edges in between. I did iron the swatch so that we can have a clearer picture of what's going on, but that's it. Here are the results after the first, third, and fifth trip through the laundry:
Round 1!
(click on any image to enlarge)
Pink suffered right out of the gate -- it appears that while the form of the pink held, the actual cross-threads did come loose, even past the inside of the sawtooth pattern. This does not bode well for pinking in the future. If it holds and doesn't fray past this point, then it could still be something of a low-rent contender for finishing, otherwise, I would only recommend pinking for something that will never see a wash/dry cycle.
The fray stop adhesive did exactly what it was supposed to do. Running it through the wash/dry cycle did not seem to compromise the adhesive, and it kept the threads from unraveling. We'll see how it holds up in multiple washes, but even if the adhesive holds strong, it will probably not be a good default solution for garments as it is more expensive than thread, doesn't "neaten up" a cut edge like the other finishing candidates, and you may find it to have a strange tactile quality.
Zig-Zag stitch did admirably as the "beginners finishing stitch," as we saw in the
Fabric and You post, using a zig-zag stitch to bind the cut edge of our purchased fabric is good enough for a single wash-dry cycle at the very least. The raw edge
did fray up to the zig-zag, but was stopped in its tracks there. How long the zig-zag stitch will continue to hold the fray in check is now the primary concern.
Next to the fray-stopping adhesive, the Overlock was the clear winner in this round. The thread that locks around the outside of the overlock stitch did exactly what it was supposed to do, and stopped the fabric from even beginning to fray. A few stray threads have escaped here and there, but we're not seeing any of the unraveling that we saw in Zig-Zag or Pink with the Overlock stitch.
Of course, all this could change with repeat washings. On to...
Round 3!
(wait, what happened to round 2? Oh yeah, I'm only doing odds.)
 |
| hello, thumb shadow. |
Once again, Pink is not looking too hot. The good news is that the fray appears to only have advanced a small amount, but it's still unraveling a bit. As I explained to mom on the phone while I was describing the experiment, I don't know if I'll ever pink on a project again, and she agreed--that with the finishing options on most modern sewing machines, not many people opt to pink for this exact reason. But the important thing is that a) you have it as an option, and b) you know what you're getting into.
The Zig-Zag stitch is holding its own. The fray is definitely "pounding the shoreline" so to speak, but it has not broken through and begun to eat away at the allowance.I think the secret to a good Zig-Zag stitch is getting it as *close* to that raw edge as possible. Yesterday I wore a wrap skirt that was an early effort, and I had a little unintentional fringe going on along my hem because I had the zig-zag too far back and there was a lot of fraying along that edge.
Overlock is still doing admirably. You can see the fray wanting to start a little bit at the edges, but it's being held pretty firmly in place by that lock thread. We're still seeing a few stray threads here and there, but they're being kept well in place and the finish is holding strong.
Surprisingly, the fray stop adhesive is starting to show a little bit of a beard. I was expecting the adhesive to be the clear winner in terms of actually preventing fraying, but to be disqualified for general use because it's an adhesive, it's too consumable (you would have to budget for buying more of it every few sewing projects in addition to the thread you would have to buy anyway), and the possible unpleasant tactile feel of the adhesive. But if it's starting to lose its integrity, overlock might run away with this one. We'll name the winner after....
Round 5!
LAST PLACE: Well, we can definitely count Pinking out as a viable form of finishing. Our cute little sawtooth is basically a poor-man's fringe at this point, while the fabric might not be
as frayed as fabric that was not pinked, it's certainly not keeping things nice and neat. I was so shocked at how poorly it did I actually worried that I had done it wrong and had to review my technique. My suggestion: Do not spring for a pair of pinking shears, especially if you expect to machine-wash your garments.
THIRD PLACE: Anti-fray adhesive has started to fall dramatically behind as a means of keeping a raw edge from fraying. Mom suggests using Fray-Away to secure a buttonhole before cutting, but it does not appear to have long-term staying power for raw-edge applications. After the third wash, the adhesive seems to have given up and now the fabric is beginning to fray and unravel normally.
SECOND PLACE: Our little Zig-Zag stitch! Now, this is with an important caveat: the further away from the raw edge that the zig-zag stitch is, the less effective it will be. If you use a zig-zag stitch, practice to get that sawtooth stitch as close to the raw edge without slipping off that you can. The zig-zag on the test swatch sees a little "fuzz" as the fabric has frayed up to the zig-zag stitch, but has basically stopped it in its tracks, but if you have it more than ⅛" from the raw edge, the unraveling strings are going to create a very messy look, and might even create enough of a purchase while washing to break through the zig-zag.
FIRST PLACE: Overlock is the clear winner here. You can see the fabric trying to fray in between the locks, but it just can't seem to get going, and it still looks like a nice, clean line even after 5 trips through the laundry. If your machine has an overlock stitch, this is definitely the way to go for having clothes that will last.
So that completes the raw-edge finishing showdown, if you have any other techniques you would like to compare, let me know in comments!


Impressive. Embroidery Digitising Services Very nice.
ReplyDelete